|
Crochet Slip Stitch!
|

Crochet slip stitch is a very useful stitch. It can be used to move your yarn along your work for necklines or armholes without breaking the yarn. It can also be used in decreasing, and even for decorative work! Read on to find out how to work this useful little stitch...
Start by working a few chains and a row of single crochet. Then turn and work 1 chain. *Push your hook into the top of the next single crochet and hook the yarn (or yarn over) and bring it back to the front of your work. Then all you do is pull that new loop through the other loop! Yup - that's it! Congratulations on nailing another stitch!
Now try some more working along to the end of the row for practice. Start from the * again. Here's some pictures to help you out.

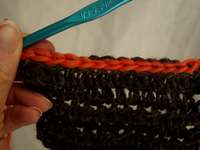
Your crochet slip stitch row will look like the picture at the top of the page. I used a contrast color to show you what to look for and to make it easier to see the new stitches.

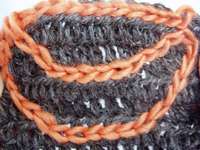
As you can see in this picture you can also use crochet slip stitch to embellish or decorate a piece of crocheted or knitted work.
You can do this by holding your yarn at the back of your work. Push your hook into the work from the front to the back where you want your decoration to begin. Hook the yarn from behind your work and bring the new loop to the front. Be sure to hold on to the loose end of yarn!
Then, again push your hook through the fabric to the back, hook the yarn and bring it to the front of your work. This time bring your newly formed loop through the old one and there you have it! You're decorating your fabric with crochet slip stitch! Here's the pictures to help you along...


Take a good look at your base fabric and see how far the stitches are apart. That will give you a guide as to how long each crochet slip stitch should be. Make sure each stitch lies nice and smooth and doesn't pull on your background.
I can't tell you as a fraction of an inch how long each stitch should be, as it all depends on the thickness of yarn you are using. You can use different thicknesses of yarn for different effects - you're not limited to using the yarn you used for the background. Have some fun with fancy yarns and make a picture on the back of a vest if you're feeling really adventurous!
As always - I'll say start small and work up to larger projects. If you start too big and can't do it, that'll put you off. Don't be put off, just keep trying. If you read my page on how to crochet you'll see that I started a long time ago thinking I couldn't do it and look what I'm doing now! Sharing my knowledge with you!
Stay positive and have fun. HAPPY CROCHETING and NEVER SAY NEVER!
Check out more fun stitch ideas here!
Going loopy? Try the loop stitch!
More basic stitch instructions here!
Return to Homepage from Crochet Slip Stitch


